Understanding Pixel Art
If you’ve used AI to generate “pixel art,” it probably looks great at a glance. But zoom in and you’ll see it’s not quite what it seems. This guide explains the difference between real and AI-generated pixel art, why it matters for your workflow, and how to convert your images.
The Zoom Test
From a distance, real pixel art and AI-generated pixel art can look identical. The difference only becomes obvious when you zoom in. Below is the same character — on the left, an AI-generated image. On the right, the same character converted to true pixel art.
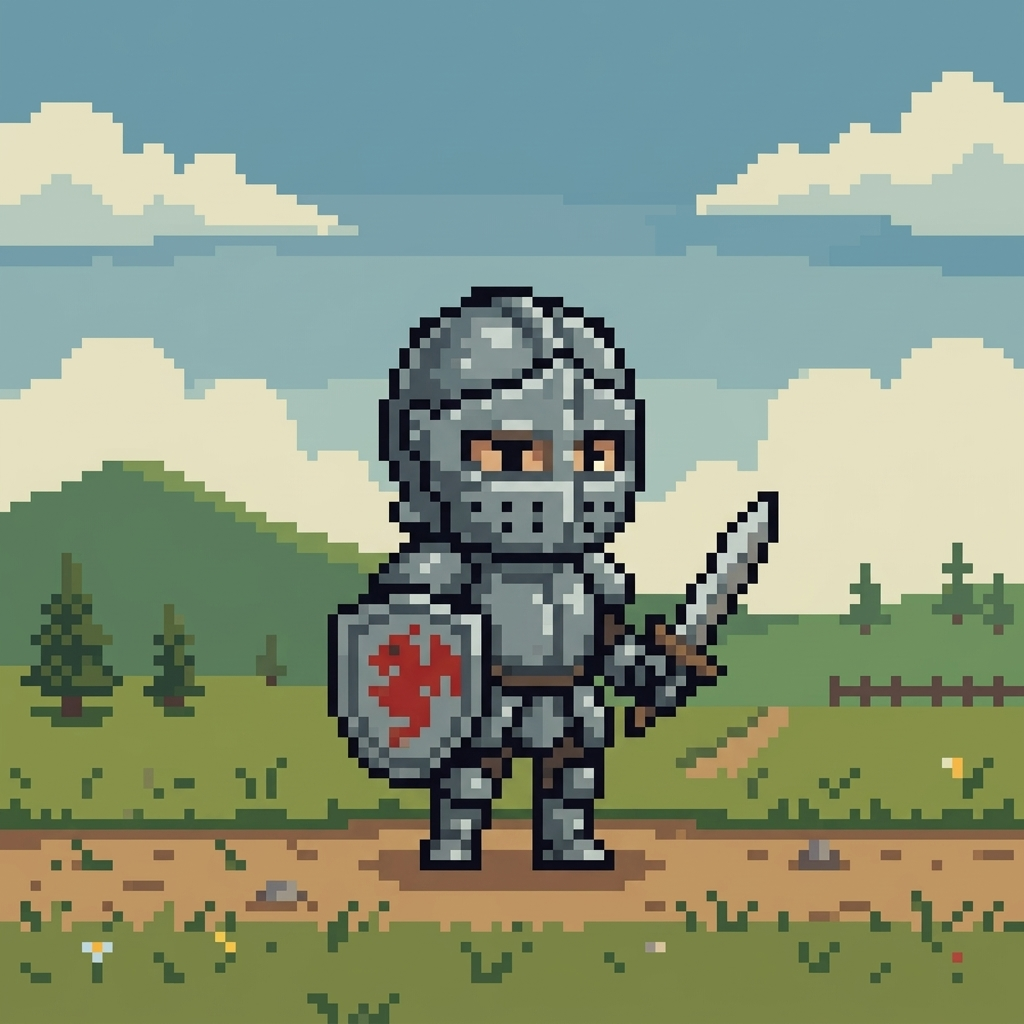

The key difference: In true pixel art, every pixel is exactly one flat color. There are no gradients, no fuzzy edges, no in-between colors. The AI image has over 10,000 unique colors — real pixel art of this same character uses around 24.
Why Does This Matter?
It’s not just a technical detail — the difference affects everything downstream:
- Animation quality — Our pixel-engine animation models are trained on real pixel art. Feed them noisy AI art and you get noisy, inconsistent results. Clean input = clean output.
- Game engine rendering — Games scale pixel art with nearest-neighbor filtering, which preserves hard edges. Anti-aliased “pixel art” looks blurry and wrong when scaled up in-engine.
- Palette control — Real pixel art uses a small, intentional palette. AI art uses thousands of slightly-different colors that make editing, palette swapping, and consistency across a spritesheet nearly impossible.
Pixel Art Detection
When you upload an image, Pixel Engine automatically classifies whether it’s true pixel art. If it isn’t, you’ll see a Not Pixel Art badge on the thumbnail. This is informational, not an error — it means the image needs conversion before it’ll work well with pixel-engine models.
How to Fix It
You have two options, depending on whether you want pixel art output or just want to animate your image as-is.
Option 1: Pixelate Your Image
The Pixelate tab converts any image into true pixel art. It detects the pixel grid, removes noise and anti-aliasing, downscales to the native resolution, and reduces the color palette — all in one step.
- Go to the Pixelate tab and select your image from the library or upload a new one.
- Adjust the color count — 24 is a good default. Lower values (8–16) give a more retro feel; higher values (32–64) preserve more detail.
- Hit Pixelate — the result saves to your library as true pixel art, ready for animation.
Option 2: Use Frame Engine
If you don’t need pixel art output and just want to animate your image as-is, switch to frame-engine-1.1 on the Animate tab. It accepts any image format and produces smooth animations without requiring pixel art input.
On the Animate tab, select your image and change the Model dropdown to frame-engine-1.1. No other changes needed.
Tips for Best Results
- Don’t over-reduce colors — too few colors will merge details together. Start with 24 and adjust down if you want a more restricted palette.
- Transparent backgrounds are preserved. If your source has a transparent background, the pixelated version will too.
- Already pixel art? If your image is real pixel art but wasn’t detected, use the “Override” button on the Pixelate tab to skip processing and mark it directly.
Next Steps
Once your image is pixelated, head to the Animate tab to bring it to life. See the Animation Guide for tips on prompting, frame counts, and starting poses.